SAP BTP Free Tier Account — How to Get Started Without Spending Anything
Table of Contents
- • Free Tier vs Trial — know the difference
- ↳ Trial Account
- ↳ Free Tier (on a Pay-As-You-Go account)
- • Step 1: Create your SAP Universal ID
- • Step 2: Sign up for BTP Free Tier
- • Step 3: Access the BTP Cockpit
- ↳ Understanding the hierarchy
- • Step 4: Create your first subaccount (if one doesn’t exist)
- ↳ Enable Cloud Foundry
- • Step 5: Add your first free service
- ↳ How to add a service
- ↳ Services I’d recommend activating first
- • Step 6: Open SAP Business Application Studio
- • Step 7: Test with a simple CAP project
- • Keeping your account free — what to watch
- • Quick checkpoint
- • Common mistakes
- • What to build next
The single biggest barrier to learning SAP BTP has always been access. SAP’s enterprise software isn’t the kind of thing you can download and install on your laptop on a Saturday afternoon. It runs on cloud infrastructure, it requires specific account setup, and historically it cost money to use.
That changed when SAP introduced the Free Tier model for BTP. And it’s genuinely free. No credit card. No “free for 14 days then we charge you.” No hidden asterisks.
But the signup and setup process is confusing if you’ve never done it before. SAP’s documentation is thorough (they cover every possible scenario), which paradoxically makes it harder for someone who just wants a simple answer to “how do I get a BTP account and start using it?”
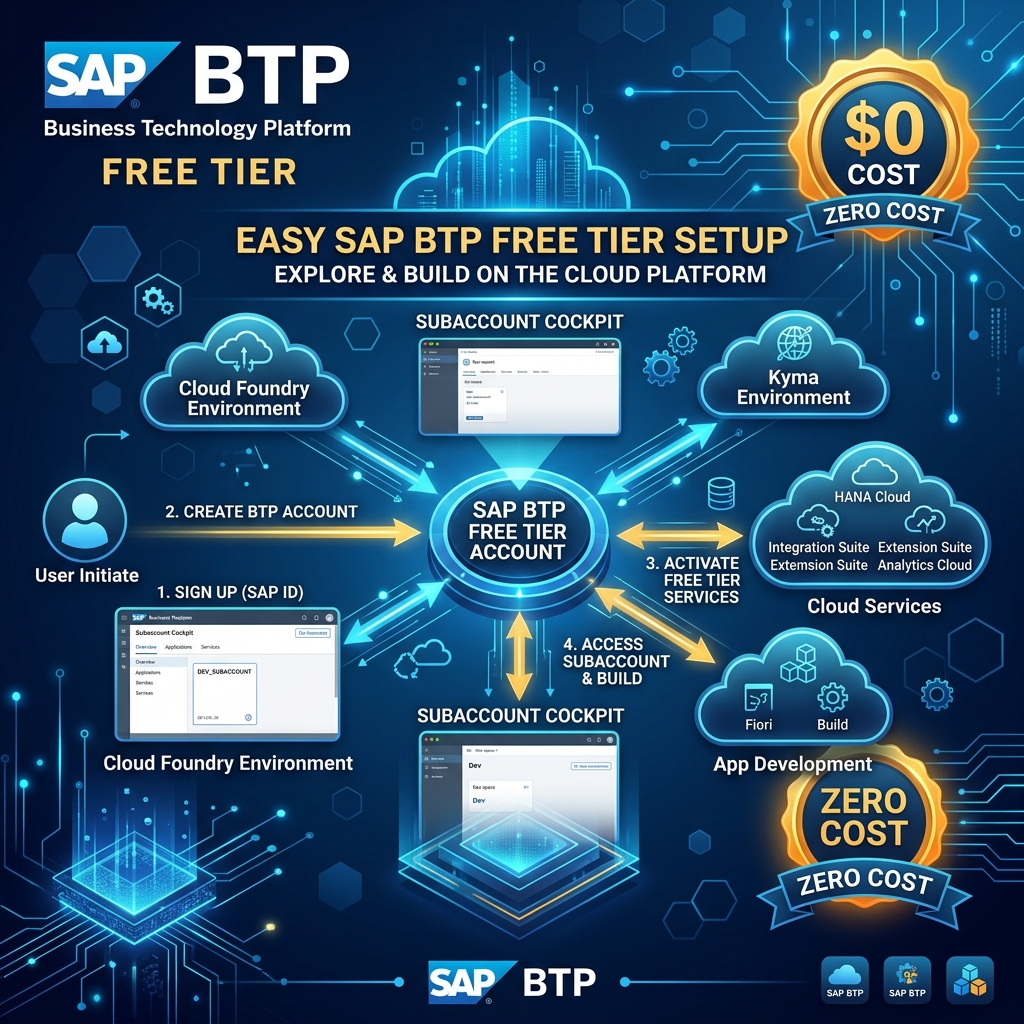
So here’s the short path. I’ll walk you through creating a BTP account, setting up a subaccount, and activating your first service. By the end of this post you’ll have a working BTP environment ready for development.
Free Tier vs Trial — know the difference
SAP offers two free options for BTP. They look similar but they work differently, and picking the wrong one will cause headaches later.
Trial Account
- Duration: 90 days. After that, everything gets deleted.
- Region: Fixed. You get whatever datacenter SAP assigns you (usually US East or Europe).
- Services: Limited selection. Some services aren’t available on trial.
- Purpose: Quick testing. Throwaway experiments. “I just want to click around and see what BTP looks like.”
- Data: Gets wiped after 90 days. No option to extend.
Free Tier (on a Pay-As-You-Go account)
- Duration: Unlimited. No expiration.
- Region: You choose. Multiple datacenter options globally.
- Services: Broader selection. Many services have a “free” plan that never charges you.
- Purpose: Serious learning. Building proof-of-concept apps. Certification preparation.
- Data: Persists indefinitely as long as you stay on free plans.
- Credit card: Required during signup for identity verification, but you will NOT be charged if you stick to free plans. SAP confirms this clearly in their terms.
My recommendation: go with Free Tier on a Pay-As-You-Go account. It gives you more services, more control, and your work doesn’t vanish after 90 days. The credit card requirement scares people, but I’ve had my account for over a year and have never been charged a single rupee. As long as you select “Free” plans when enabling services, the billing stays at zero.
Step 1: Create your SAP Universal ID
If you don’t have an SAP account yet, you need one.
Go to account.sap.com and click Register.
Fill in your details:
- Use your real name (this account will be linked to SAP certifications and learning if you use SAP Learning Hub later)
- Use a personal email that you’ll keep long-term (not a company email that might get deactivated)
- Set a strong password
Verify your email. Done. You now have an SAP Universal ID.
If you already have an S-user or P-user from a company, you can link that to your Universal ID later. For now, the personal registration is enough.
Step 2: Sign up for BTP Free Tier
Go to store.sap.com.
Search for “SAP BTP” or navigate directly to the BTP section. Look for “SAP BTP Pay-As-You-Go” or “Start your free cloud experience” (the exact button text changes occasionally as SAP updates the page, but the intent is the same).
Click through the signup flow:
- Accept the terms and conditions.
- Select your preferred datacenter region. If you’re in India, pick India (Mumbai) or Singapore for lowest latency. If in Europe, pick EU10 (Frankfurt) or EU20 (Netherlands).
- Enter your credit card details for verification. (Again — you won’t be charged. SAP may place a temporary hold of $1 or ₹1 that gets reversed.)
- Complete the registration.
Within a few minutes, you’ll receive an email confirmation. Your BTP global account is now active.
Step 3: Access the BTP Cockpit
The BTP Cockpit is where you manage everything. Think of it as your control panel.
Go to cockpit.btp.cloud.sap and log in with your SAP Universal ID.
You’ll see your Global Account. Inside the Global Account, you’ll see a default subaccount that SAP may have created for you (usually named “trial” or your region name).
Understanding the hierarchy
Global Account (your entire BTP world)
  └── Subaccount (a working environment)
        └── Spaces (for Cloud Foundry apps)
        └── Service Instances (databases, AI services, etc.)
Global Account: The top-level container. Think of it as your organization. You have one.
Subaccount: A project workspace inside your global account. You can have multiple subaccounts (e.g., one for learning ABAP Cloud, one for CAP projects, one for integration). Each subaccount connects to a specific datacenter region and cloud runtime.
Spaces: Inside a Cloud Foundry subaccount, spaces are where you actually deploy applications. Common setup is dev, test, prod spaces. For learning, one space is enough.
Step 4: Create your first subaccount (if one doesn’t exist)
If SAP didn’t auto-create a subaccount:
- In the BTP Cockpit, click Create → Subaccount.
- Give it a name (e.g.,
learning-dev). - Select your region (same as what you chose during signup).
- Under Environment, select Cloud Foundry (this is the most common runtime for BTP development).
- Click Create.
After creation, click into the subaccount. You’ll see the subaccount overview page.
Enable Cloud Foundry
Inside your subaccount:
- Click Enable Cloud Foundry (if not already enabled).
- Choose a plan: select Free (Application Runtime) or Standard depending on availability.
- An org will be created automatically.
- Create a Space by clicking Create Space → name it
dev.
Your Cloud Foundry environment is now ready. This is where you’ll deploy Node.js, Java, or CAP applications.
Step 5: Add your first free service
This is the fun part. BTP offers dozens of services, and many of them have a free plan.
How to add a service
- In your subaccount, click Service Marketplace in the left navigation.
- Browse or search for the service you want.
- Click on the service tile → click Create.
- In the plan dropdown, select the Free plan (if available) or Lite plan.
- Click Create.
The service instance will be provisioned in a few seconds to a few minutes.
Services I’d recommend activating first
| Service | Free Plan? | What it does |
|---|---|---|
| SAP HANA Cloud | Yes (30 GB) | In-memory database. Needed for CAP apps and ABAP Cloud. |
| SAP Business Application Studio (BAS) | Yes | Web-based IDE. Like VS Code in your browser. This is where you write code. |
| SAP Build Work Zone, standard edition | Yes | Launchpad service. Hosts your Fiori apps and creates a central entry point. |
| Cloud Foundry Runtime | Yes (limited) | The compute environment that runs your apps. |
| SAP ABAP Environment | Yes (limited) | ABAP Cloud / Steampunk. Write ABAP in the cloud. |
| Destination Service | Yes | Manages connections between BTP and backend SAP systems. |
For learning, start with SAP Business Application Studio and SAP HANA Cloud. With these two, you can build CAP applications (Node.js + HANA), Fiori apps, and practice ABAP Cloud development.
Step 6: Open SAP Business Application Studio
Once you’ve created a BAS instance:
- Go to Instances and Subscriptions in your subaccount.
- Find SAP Business Application Studio → click Go to Application.
- BAS opens in a new browser tab. It looks like VS Code (because it’s based on the same foundation, Eclipse Theia / VS Code).
- Click Create Dev Space.
- Choose a template:
- Full Stack Cloud Application — for CAP projects (recommended for beginners)
- SAP Fiori — for building Fiori/UI5 apps
- SAP ABAP — for ABAP Cloud development
- Give it a name and click Create.
- Wait 2-3 minutes for the dev space to start. When the status changes to “Running,” click the name to open it.
You’re now inside a cloud-based IDE connected to your BTP subaccount. You can create projects, write code, deploy apps — all from your browser. No local installation needed.
Step 7: Test with a simple CAP project
Let me walk you through creating a basic project so you can verify everything works.
Inside BAS, open a terminal (Terminal → New Terminal) and run:
cds init my-first-project
cd my-first-project
npm install
This creates a new CAP (Cloud Application Programming Model) project. CAP is SAP’s recommended framework for building cloud applications on BTP.
Create a simple data model. In the db/ folder, create a file called schema.cds:
namespace my.first;

entity Products {
  key ID : Integer;
  name   : String(100);
  price  : Decimal(10,2);
  stock  : Integer;
}
Create a service. In the srv/ folder, create catalog-service.cds:
using my.first from '../db/schema';

service CatalogService {
  entity Products as projection on first.Products;
}
Run the project locally:
cds watchBAS will show a popup: “A service is listening on port 4004.” Click Open in New Tab.
You’ll see the CAP service running with a link to the Products entity. Click it. You’ll see an empty JSON array (no data yet, which is correct).
If you see this, everything works. Your BTP environment is properly configured, BAS is running, and you’ve just built your first cloud application on SAP BTP.
Keeping your account free — what to watch
The single most important rule: always select the “Free” or “Lite” plan when creating service instances.
Some services have confusing plan names. Here’s how to read them:
| Plan name | Will you be charged? |
|---|---|
| Free | No |
| Lite | No |
| Trial | No (but time-limited) |
| Standard | Depends on usage. Usually yes beyond free tier limits. |
| Premium | Yes |
| Enterprise | Yes |
To check your current billing status:
- Go to your Global Account in the BTP Cockpit.
- Click Usage Analytics in the left menu.
- Review the usage for each service. Free tier services will show usage but zero cost.
If you accidentally create a paid service instance, just delete it immediately. You’ll only be charged for actual usage, and if you delete it within minutes, the charge will be negligible (usually zero).
Quick checkpoint
Question 1: You want to learn SAP BTP but your work disappears after 90 days. Which account type did you choose?
Answer: Trial Account. Switch to Free Tier on a Pay-As-You-Go account for permanent access.
Question 2: You created a Cloud Foundry subaccount but can’t deploy apps. What’s missing?
Answer: You probably haven’t created a Space inside the Cloud Foundry org. Go to the subaccount → Cloud Foundry → Spaces → Create Space.
Question 3: You want to build a CAP application with a database. Which two free services do you need?
Answer: SAP Business Application Studio (the IDE) and SAP HANA Cloud (the database).
Common mistakes
Mistake 1: Choosing Trial instead of Free Tier. Trial accounts expire and delete everything after 90 days. If you’re investing time in learning, use the Free Tier. Your projects will persist.
Mistake 2: Panicking about the credit card. SAP requires it for identity verification on Pay-As-You-Go accounts. But you will not be charged if you use free plans. I’ve verified this personally over 12+ months of usage.
Mistake 3: Not stopping HANA Cloud when not in use. SAP HANA Cloud on the free tier has a limit of 30 GB and auto-stops after inactivity. This is fine. But if you’re running it 24/7 on a non-free plan, costs add up. On the free plan, it auto-manages itself. Just be aware that you may need to manually start it again after a period of inactivity.
Mistake 4: Forgetting the subaccount region. Once you create a subaccount in a specific region (e.g., US East), you can’t change it. Some services are only available in certain regions. Check service availability for your region before creating the subaccount.
Mistake 5: Trying to use BTP without understanding the hierarchy. Global Account → Subaccount → Space. Services are enabled at the subaccount level. Apps are deployed to spaces. Mixing these up causes confusion about where things are and why you can’t find them.
What to build next
Once your BTP account is set up and BAS is running, here are practical next steps:
- Follow the CAP tutorial on SAP’s official site — build a complete bookshop application with data model, service, UI, and deployment.
- Create a Fiori app — use the Fiori template in BAS to build a list report connected to your CAP service.
- Try ABAP Cloud — create an SAP ABAP Environment instance and write your first ABAP class in the cloud.
- Connect to an SAP backend — set up a Destination in BTP pointing to an SAP sandbox system and build an app that reads real SAP data.
Each of these deserves its own tutorial (and we’ve covered several of them on this site already). But you now have the foundation — a working, free, permanent BTP environment to build on.
Related reads on this site:
- SAP BTP Explained — what BTP is and why it matters
- SAP BTP CAP Model Guide — deep dive into the Cloud Application Programming Model
- SAP Build Apps Low Code Guide — building apps without code on BTP
- SAP BTP ABAP Environment (Steampunk) — writing ABAP in the cloud

Written by Daksh Dedha
SAP Technical ConsultantDaksh is an SAP Technical Consultant specializing in ABAP programming, SAP S/4HANA migrations, Fiori development, and BTP cloud architecture. He authors free, hands-on tutorials to make enterprise SAP education accessible to all developers.
Test Your Knowledge
Loading question...
Quiz Completed
Related Tutorials
SAP BTP Event Mesh — Asynchronous Integration and Event-Driven Architecture Guide
Understand SAP BTP Event Mesh for event-driven architecture. Learn how queues, topics, webhooks, and asynchronous integration work between S/4HANA and cloud applications.
SAP BTPSAP Build Process Automation — Workflow, RPA, and Business Rules on BTP Guide
Master SAP Build Process Automation on SAP BTP. Learn how workflows, Robotic Process Automation (RPA), Business Rules, and low-code forms automate enterprise processes.
SAP BTPSAP CAP Model Explained – Build Cloud Apps on BTP with Node.js
Learn what SAP CAP (Cloud Application Programming Model) is, how it works on BTP, and how to build your first cloud app with CDS and Node.js.
Found this tutorial useful? Share it with your SAP development team.