
SAP Fiori RAP Backend Development — Complete Beginner to Advanced Guide for Building Modern Fiori Apps in 2026
Table of Contents
- • What Is SAP RAP — The Honest Plain English Explanation
- • Why RAP Replaced SAP Gateway — The Real Reason
- ↳ Problem 1 — Duplication Everywhere
- ↳ Problem 2 — No Standard Business Logic Framework
- ↳ Problem 3 — OData V4 Only
- ↳ Problem 4 — No Draft Handling
- • RAP Architecture — The Three Layer Model
- • Interactive RAP Stack Pipeline Visualizer
- • Step 1 — Database Table
- • Step 2 — Interface CDS View (Data Model Foundation)
- • Step 3 — Consumption CDS View (UI Facing)
- • Step 4 — Behavior Definition
- • Step 5 — Behavior Implementation Class
- • Step 6 — Service Definition and Binding
- • Step 7 — Connecting RAP to Fiori Elements App
- • RAP Managed vs Unmanaged — When to Use Which
- ↳ Managed RAP
- ↳ Unmanaged RAP
- • Draft Handling in RAP — Why It Matters for Real Apps
- • Common RAP Mistakes Beginners Make
- • RAP Career Value in 2026 — Why This Skill Pays
- • Free Resources to Learn RAP Right Now
- • Looking Ahead
- • Self-Assessment Checkpoint
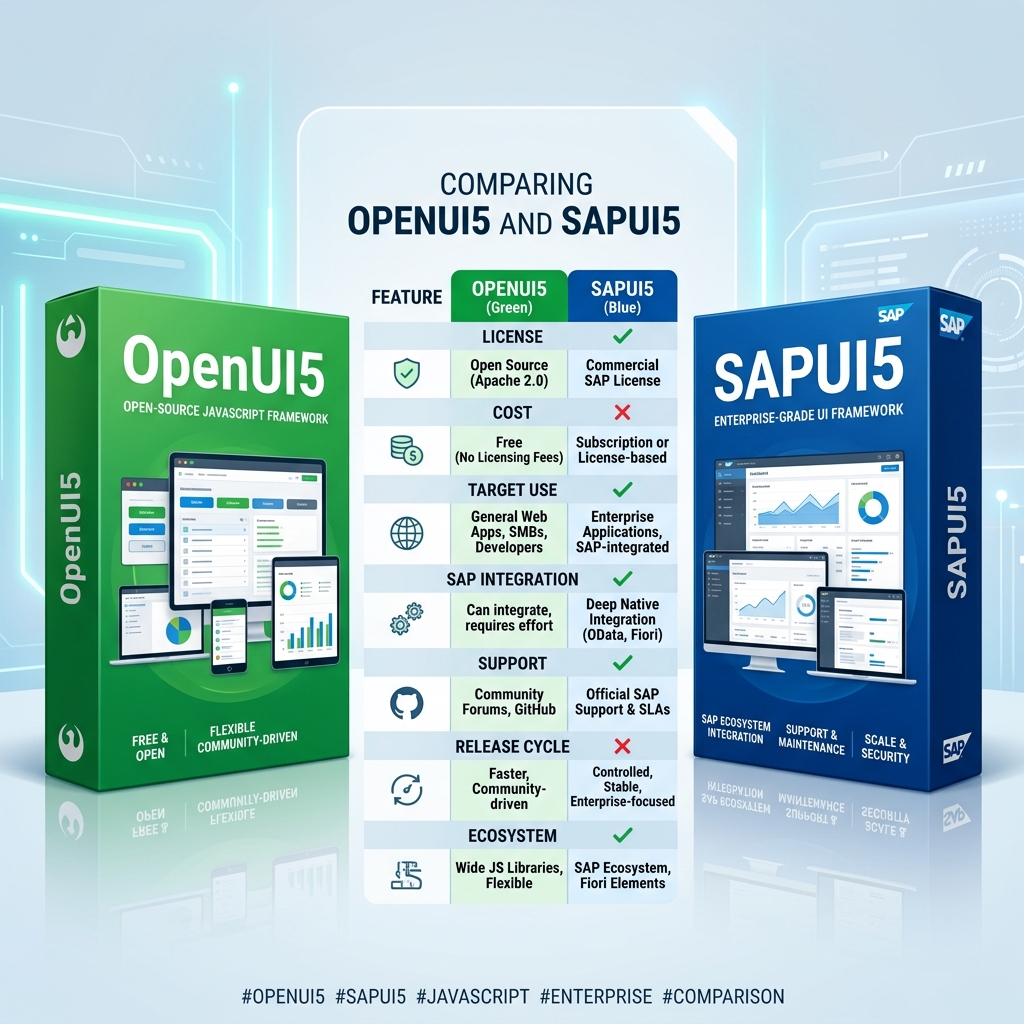 Figure 1: ABAP RESTful Application Programming Model (RAP) serves as the unified modern backend framework for S/4HANA Cloud and BTP services.
Okay let me start this post with a confession.
When I first heard “RAP” in an SAP context — my brain went to music. Literally. Took me a second to switch gears.
RAP here stands for RESTful ABAP Programming Model — and once I actually understood what it was and what problem it solved, I genuinely wished someone had explained it to me two years earlier. Because RAP is not just another SAP framework with a confusing name. It’s the single most important shift in ABAP development in the last decade — and if you’re building Fiori apps in 2026 without understanding RAP, you’re building them the hard way.
This post covers everything. What RAP is, why it exists, how it’s structured, how to build a complete RAP service from scratch, and how it connects directly to Fiori Elements to produce production-quality apps.
Step by step. Plain English. Real code.
Let’s go.
What Is SAP RAP — The Honest Plain English Explanation
RAP stands for RESTful ABAP Programming Model.
Before RAP, building an OData service in SAP meant using SAP Gateway — a separate framework with its own transaction codes (SEGW), its own code generation patterns, its own quirks, and its own maintenance overhead. It worked but it was verbose, repetitive, and felt disconnected from the actual ABAP data model.
RAP changed the entire approach.
Instead of separately defining an OData service in Gateway and then writing ABAP to fulfill it — RAP lets you define everything in one place using CDS (Core Data Services) views and Behavior Definitions. The OData V4 service generates automatically from these definitions.
Here is the simplest way to understand RAP:
Think of RAP as a contract system. You define your data model (CDS views), you declare what operations are allowed on that data (Behavior Definition), you implement the business logic for those operations (Behavior Implementation Class), and RAP automatically exposes all of it as a standards-compliant OData V4 service that Fiori Elements consumes directly.
One coherent system. No separate Gateway project. No duplicate code. No manual OData node creation.
Why RAP Replaced SAP Gateway — The Real Reason
Gateway worked. Millions of SAP Fiori apps were built with it. So why did SAP introduce RAP?
Four genuine problems with Gateway that RAP solves:
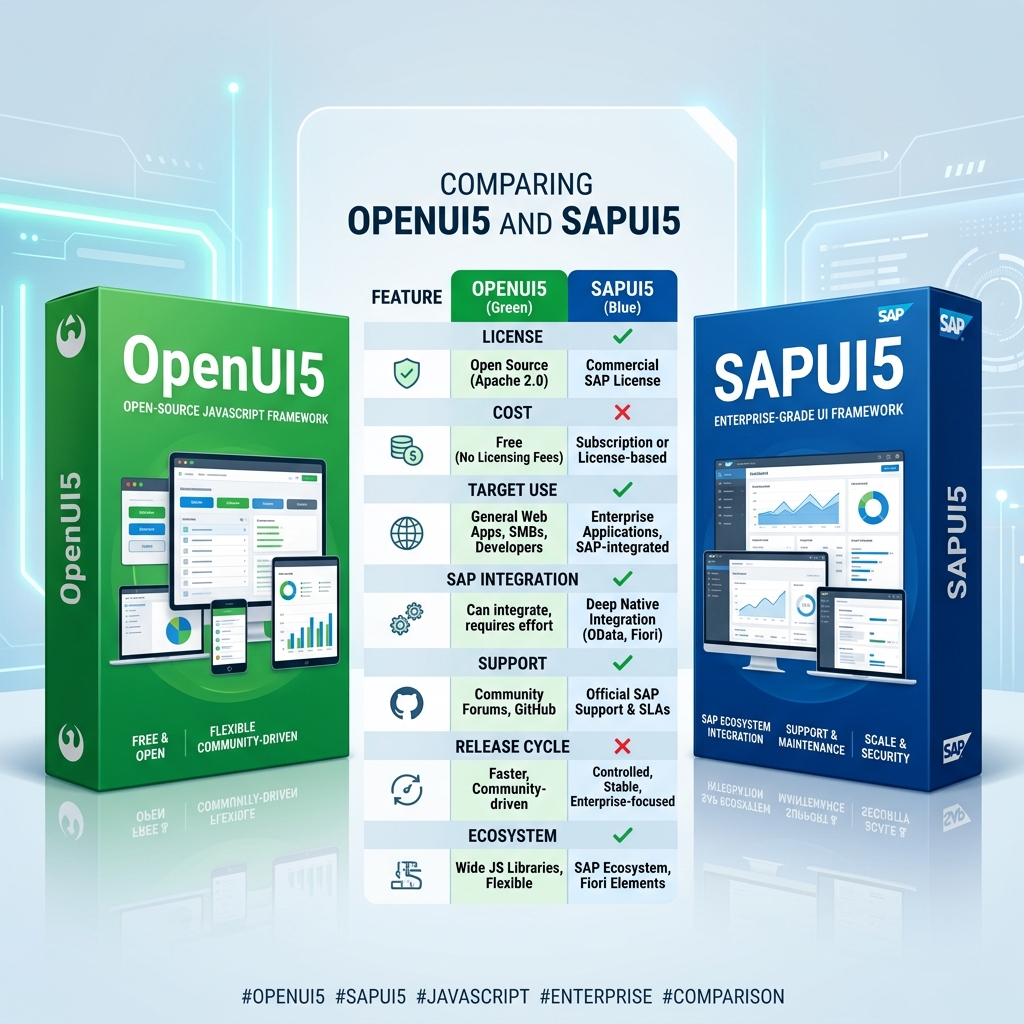 Figure 2: Contrasting SEGW Gateway mapping routes with ABAP RAP’s direct unified repository.
Problem 1 — Duplication Everywhere
Gateway required you to define your data model in ABAP Dictionary, then define it again in SEGW as OData entity types, then write ABAP methods to map between the two. Change one field in your database table — update it in three places. RAP’s CDS-based approach defines everything once.
Problem 2 — No Standard Business Logic Framework
Gateway gave you method stubs — CREATE_ENTITY, UPDATE_ENTITY, DELETE_ENTITY — but no guidance or framework for implementing proper business logic, validations, determinations, or side effects. Every developer invented their own pattern. RAP provides a complete, opinionated framework for all of this.
Problem 3 — OData V4 Only
Gateway was built for OData V2. OData V4 is significantly more powerful — better batch processing, richer query options, action and function support, delta tokens. RAP generates OData V4 natively.
Problem 4 — No Draft Handling
Modern Fiori apps support draft functionality — users can start filling a form, leave, come back later, and continue from where they stopped. Implementing draft in Gateway was extraordinarily complex. RAP has built-in draft handling that works with a single annotation.
RAP Architecture — The Three Layer Model
Understanding RAP architecture before writing code saves enormous confusion. RAP has three distinct layers that work together.
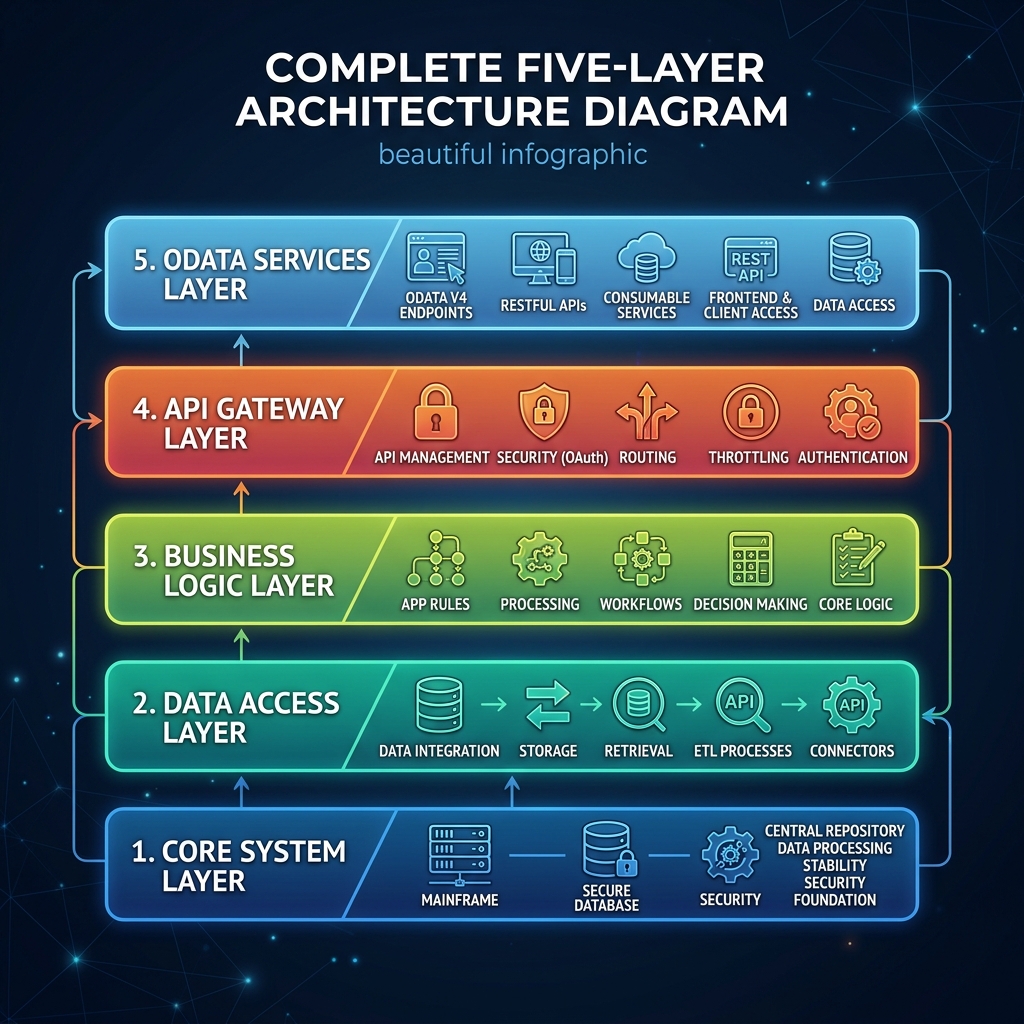 Figure 3: Layered isolation from transparent physical database tables up to exposed Service Bindings.
┌─────────────────────────────────────┐
│         FIORI ELEMENTS APP          │
│         (SAPUI5 Frontend)           │
└──────────────┬──────────────────────┘
               │ OData V4
┌──────────────▼──────────────────────┐
│         SERVICE LAYER               │
│   Service Definition + Binding      │
│   (Exposes CDS as OData V4)         │
└──────────────┬──────────────────────┘
               │
┌──────────────▼──────────────────────┐
│         BUSINESS OBJECT LAYER       │
│                                     │
│  ┌─────────────────────────────┐    │
│  │    CDS View (Data Model)    │    │
│  │  Interface View + Cons View │    │
│  └──────────────┬──────────────┘    │
│                 │                   │
│  ┌──────────────▼──────────────┐    │
│  │   Behavior Definition       │    │
│  │  (Allowed Operations)       │    │
│  └──────────────┬──────────────┘    │
│                 │                   │
│  ┌──────────────▼──────────────┐    │
│  │  Behavior Implementation    │    │
│  │  (Business Logic ABAP)      │    │
│  └─────────────────────────────┘    │
└─────────────────────────────────────┘
               │
┌──────────────▼──────────────────────┐
│         DATABASE LAYER              │
│    HANA Tables / CDS Base Views     │
└─────────────────────────────────────┘
Each layer has a specific responsibility. Nothing crosses boundaries. Clean separation makes the whole system maintainable and testable.
Interactive RAP Stack Pipeline Visualizer
Review the 7 technical development stages to deploy an active OData V4 backend endpoint in RAP. Click on each stack step below to inspect the code declarations and database maps:
  <button class="rap-step-btn active-rap-step w-full text-left p-2 rounded text-[11px] font-semibold border outline-none transition-all flex justify-between items-center bg-primary/5 text-primary border-primary" data-step="table">
    <span>Step 1. Database Table</span>
    <span class="text-[8px] bg-primary/10 text-primary px-1.5 py-0.5 rounded uppercase">SE11</span>
  </button>

  <button class="rap-step-btn w-full text-left p-2 rounded text-[11px] font-semibold border outline-none transition-all flex justify-between items-center bg-transparent border-hairline text-ink hover:bg-canvas-parchment" data-step="interface">
    <span>Step 2. Interface View</span>
    <span class="text-[8px] bg-ink-muted-80/10 text-ink px-1.5 py-0.5 rounded uppercase">ZI Entity</span>
  </button>

  <button class="rap-step-btn w-full text-left p-2 rounded text-[11px] font-semibold border outline-none transition-all flex justify-between items-center bg-transparent border-hairline text-ink hover:bg-canvas-parchment" data-step="consumption">
    <span>Step 3. Consumption View</span>
    <span class="text-[8px] bg-ink-muted-80/10 text-ink px-1.5 py-0.5 rounded uppercase">ZC Entity</span>
  </button>

  <button class="rap-step-btn w-full text-left p-2 rounded text-[11px] font-semibold border outline-none transition-all flex justify-between items-center bg-transparent border-hairline text-ink hover:bg-canvas-parchment" data-step="bdef">
    <span>Step 4. Behavior Def (BDEF)</span>
    <span class="text-[8px] bg-ink-muted-80/10 text-ink px-1.5 py-0.5 rounded uppercase">BDEF contract</span>
  </button>

  <button class="rap-step-btn w-full text-left p-2 rounded text-[11px] font-semibold border outline-none transition-all flex justify-between items-center bg-transparent border-hairline text-ink hover:bg-canvas-parchment" data-step="impl">
    <span>Step 5. Behavior Impl</span>
    <span class="text-[8px] bg-ink-muted-80/10 text-ink px-1.5 py-0.5 rounded uppercase">ABAP Class</span>
  </button>

  <button class="rap-step-btn w-full text-left p-2 rounded text-[11px] font-semibold border outline-none transition-all flex justify-between items-center bg-transparent border-hairline text-ink hover:bg-canvas-parchment" data-step="definition">
    <span>Step 6. Service Def (SRVD)</span>
    <span class="text-[8px] bg-ink-muted-80/10 text-ink px-1.5 py-0.5 rounded uppercase">Exposition</span>
  </button>

  <button class="rap-step-btn w-full text-left p-2 rounded text-[11px] font-semibold border outline-none transition-all flex justify-between items-center bg-transparent border-hairline text-ink hover:bg-canvas-parchment" data-step="binding">
    <span>Step 7. Service Binding</span>
    <span class="text-[8px] bg-ink-muted-80/10 text-ink px-1.5 py-0.5 rounded uppercase">OData V4</span>
  </button>
</div>

<div class="flex-1 p-6 overflow-y-auto flex flex-col bg-canvas gap-4 justify-between">
  <div class="flex-1 overflow-y-auto">

    <!-- TABLE -->
    <div id="rap-table-panel" class="rap-panel flex flex-col gap-3">
      <span class="text-[12px] font-bold text-ink font-body-strong">Step 1: Database transparent table</span>
      <div class="bg-slate-950 text-white rounded p-3 font-mono text-[10px] leading-tight overflow-x-auto border border-hairline">
define table zemployee_t {
key client : abap.clnt not null;
key employee_id : abap.char(8) not null;
first_name : abap.char(40);
...
local_last_changed_at : abp_locinst_lastchange_tstmpl;
}
      </div>
      <p class="text-[12px] text-ink-muted-80 leading-relaxed mt-1">
        **Database Layer:** The system transparent table stores physical records. It must include administrative stamp fields (`created_at`, `local_last_changed_at`) to serve draft handling and locking state machines.
      </p>
    </div>

    <!-- INTERFACE -->
    <div id="rap-interface-panel" class="rap-panel flex flex-col gap-3 hidden">
      <span class="text-[12px] font-bold text-ink font-body-strong">Step 2: Interface CDS View (ZI)</span>
      <div class="bg-slate-950 text-white rounded p-3 font-mono text-[10px] leading-tight overflow-x-auto border border-hairline">
@ObjectModel.usageType: { serviceQuality: #X }
define view entity ZI_Employee
as select from zemployee_t
{
key employee_id as EmployeeId,
first_name as FirstName,
...
}
      </div>
      <p class="text-[12px] text-ink-muted-80 leading-relaxed mt-1">
        **Data Model Foundation:** Represents raw data structures. It stays clean and free of UI decorations, serving as the reusable core entity projection.
      </p>
    </div>

    <!-- CONSUMPTION -->
    <div id="rap-consumption-panel" class="rap-panel flex flex-col gap-3 hidden">
      <span class="text-[12px] font-bold text-ink font-body-strong">Step 3: Consumption CDS View (ZC)</span>
      <div class="bg-slate-950 text-white rounded p-3 font-mono text-[10px] leading-tight overflow-x-auto border border-hairline">
@Metadata.allowExtensions: true
@UI.headerInfo: { typeName: 'Employee' }
define view entity ZC_Employee
as projection on ZI_Employee
{
@UI.lineItem: [{ position: 10 }]
@UI.selectionField: [{ position: 10 }]
key EmployeeId,
...
}
      </div>
      <p class="text-[12px] text-ink-muted-80 leading-relaxed mt-1">
        **UI Exposure Layer:** Placed directly on top of the Interface View. Binds `@UI` annotations to expose layout parameters (columns, filters, tabs) that Fiori Elements reads.
      </p>
    </div>

    <!-- BDEF -->
    <div id="rap-bdef-panel" class="rap-panel flex flex-col gap-3 hidden">
      <span class="text-[12px] font-bold text-ink font-body-strong">Step 4: Behavior Definition (BDEF)</span>
      <div class="bg-slate-950 text-white rounded p-3 font-mono text-[10px] leading-tight overflow-x-auto border border-hairline">
managed implementation in class zbp_employee unique;
with draft;
define behavior for ZC_Employee alias Employee
persistent table zemployee_t
draft table zemployee_d
{
create; update; delete;
validation validateEmail on save { create; update; }
}
      </div>
      <p class="text-[12px] text-ink-muted-80 leading-relaxed mt-1">
        **Behavior Contract:** Defines what operations are allowed. Declares validators, determinations, custom actions, and links draft storage tables.
      </p>
    </div>

    <!-- IMPL -->
    <div id="rap-impl-panel" class="rap-panel flex flex-col gap-3 hidden">
      <span class="text-[12px] font-bold text-ink font-body-strong">Step 5: Behavior Implementation ABAP Class</span>
      <div class="bg-slate-950 text-white rounded p-3 font-mono text-[10px] leading-tight overflow-x-auto border border-hairline">
CLASS zbp_employee IMPLEMENTATION.
METHOD validateEmail.
READ ENTITIES OF ZC_Employee IN LOCAL MODE
ENTITY Employee FIELDS ( Email )
WITH CORRESPONDING #( keys ) RESULT DATA(lt_emp).
...
ENDMETHOD.
ENDCLASS.
      </div>
      <p class="text-[12px] text-ink-muted-80 leading-relaxed mt-1">
        **Business Logic Layer:** The actual ABAP handler code. Validates parameters, executes number ranges, and runs updates `IN LOCAL MODE` to skip lock checks.
      </p>
    </div>

    <!-- DEFINITION -->
    <div id="rap-definition-panel" class="rap-panel flex flex-col gap-3 hidden">
      <span class="text-[12px] font-bold text-ink font-body-strong">Step 6: Service Definition (SRVD)</span>
      <div class="bg-slate-950 text-white rounded p-3 font-mono text-[10px] leading-tight overflow-x-auto border border-hairline">
@EndUserText.label: 'Employee Service Definition'
define service ZSD_Employee {
expose ZC_Employee as Employee;
}
</div>
<p class="text-[12px] text-ink-muted-80 leading-relaxed mt-1">
**Service Exposition:** Declares which consumption CDS entities are exposed as OData entity sets, defining their public service names.
</p>
</div>
<!-- BINDING -->
<div id="rap-binding-panel" class="rap-panel flex flex-col gap-3 hidden">
<span class="text-[12px] font-bold text-ink font-body-strong">Step 7: Service Binding (SRVB)</span>
<div class="bg-slate-950 text-white rounded p-3 font-mono text-[10px] leading-tight overflow-x-auto border border-hairline">/* Service Binding Configuration */ Binding Type: OData V4 - UI Service Definition: ZSD_Employee Status: Published Endpoint: /sap/opu/odata4/sap/zsd_employee/...
</div>
<p class="text-[12px] text-ink-muted-80 leading-relaxed mt-1">
**Endpoint Binding:** Links the Service Definition to a specific transport protocol (such as OData V4 - UI) and activates the live REST URL for frontend consumption.
</p>
</div>
</div>
<div class="border-t border-hairline pt-3 flex items-center justify-between text-[10px] text-ink-muted-48">
<span>*Select stack items in the left panel to review configuration profiles.</span>
<span class="text-primary font-semibold">Eclipse ADT / BTP Stack</span>
</div>
</div>Step 1 — Database Table
Every RAP app starts with a database table. Create this in SE11 or using Eclipse ADT.
@EndUserText.label : 'Employee Master Table'
@AbapCatalog.enhancement.category : #NOT_EXTENSIBLE
@AbapCatalog.tableCategory : #TRANSPARENT
@AbapCatalog.deliveryClass : #A
@AbapCatalog.dataMaintenance : #RESTRICTED
define table zemployee_t {
key client : abap.clnt not null;
key employee_id : abap.char(8) not null;
first_name : abap.char(40);
last_name : abap.char(40);
email : abap.char(100);
department : abap.char(30);
designation : abap.char(50);
joining_date : abap.dats;
salary : abap.dec(13,2);
status : abap.char(1);
created_by : abp_creation_user;
created_at : abp_creation_tstmpl;
last_changed_by : abp_lastchange_user;
last_changed_at : abp_lastchange_tstmpl;
local_last_changed_at : abp_locinst_lastchange_tstmpl;
}Notice the last five fields — created_by, created_at, last_changed_by, last_changed_at, local_last_changed_at. These are administrative fields that RAP uses for optimistic locking and draft handling. Always include them in RAP-managed tables — RAP framework populates them automatically.
Step 2 — Interface CDS View (Data Model Foundation)
Interface view is your raw data model — clean, reusable, no UI annotations.
@AbapCatalog.viewEnhancementCategory: [#NONE]
@AccessControl.authorizationCheck: #CHECK
@EndUserText.label: 'Employee Interface View'
@Metadata.ignorePropagatedAnnotations: true
@ObjectModel.usageType:{
serviceQuality: #X,
sizeCategory: #S,
dataClass: #MIXED
}
define view entity ZI_Employee
as select from zemployee_t
{
key employee_id as EmployeeId,
first_name as FirstName,
last_name as LastName,
email as Email,
department as Department,
designation as Designation,
joining_date as JoiningDate,
salary as Salary,
status as Status,
created_by as CreatedBy,
@Semantics.systemDateTime.createdAt: true
created_at as CreatedAt,
last_changed_by as LastChangedBy,
@Semantics.systemDateTime.lastChangedAt: true
last_changed_at as LastChangedAt,
@Semantics.systemDateTime.localInstanceLastChangedAt: true
local_last_changed_at as LocalLastChangedAt
}Key points here:
@AccessControl.authorizationCheck: #CHECK— access control object will be checked before data is returned. Never use#NOT_REQUIREDin production.@Semantics.systemDateTimeannotations — these tell RAP which fields are timestamps for optimistic locking. Critical for concurrent edit detection.
Interface view stays clean. No UI annotations here. This view gets reused across multiple consumption views, reports, and services.
Step 3 — Consumption CDS View (UI Facing)
Consumption view sits on top of interface view and adds all UI annotations for Fiori Elements.
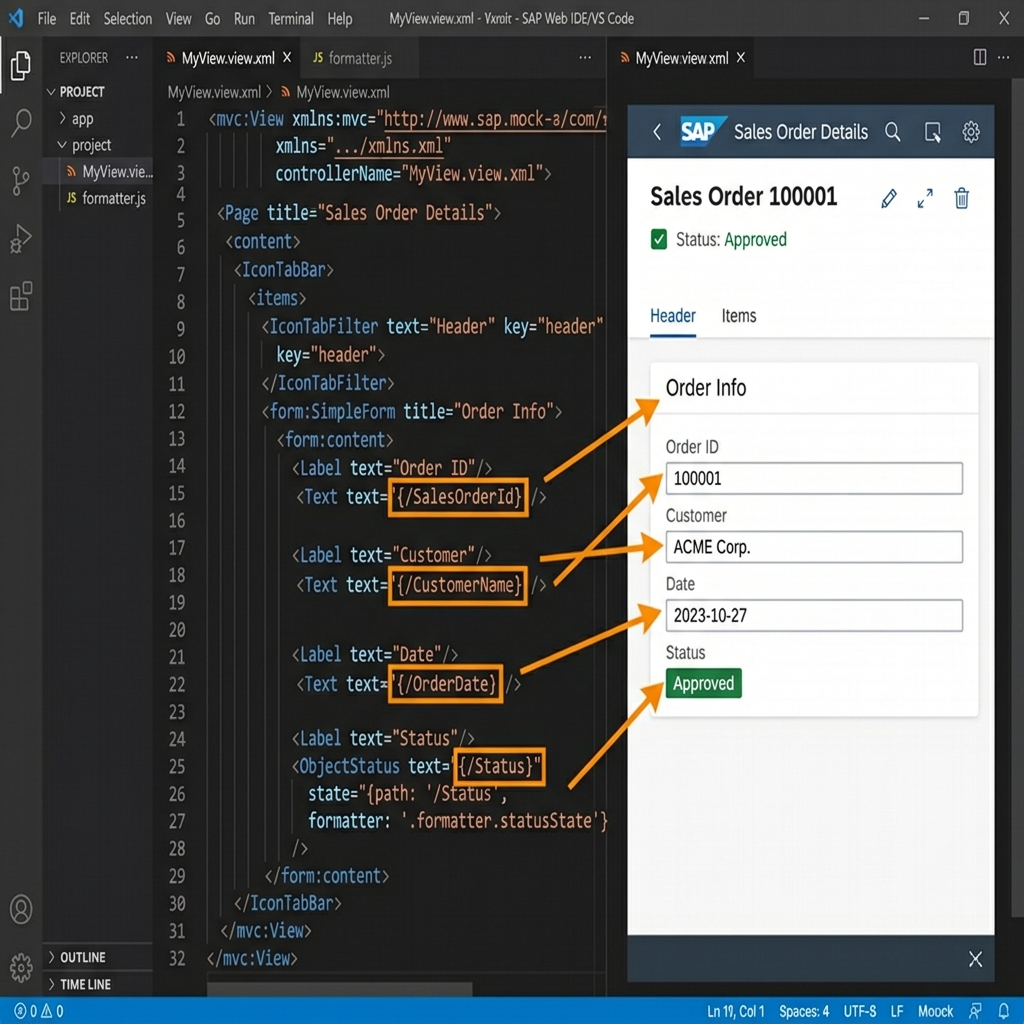 Figure 4: Exposing table columns and selection search parameters inside the CDS entity projection.
@AbapCatalog.viewEnhancementCategory: [#NONE]
@AccessControl.authorizationCheck: #CHECK
@EndUserText.label: 'Employee Consumption View'
@Metadata.allowExtensions: true
@UI.headerInfo: {
typeName: 'Employee',
typeNamePlural: 'Employees',
title: {
type: #STANDARD,
value: 'EmployeeId'
},
description: {
type: #STANDARD,
value: 'FirstName'
}
}
define view entity ZC_Employee
as projection on ZI_Employee
{
@UI.facet: [{
id: 'EmployeeInfo',
type: #COLLECTION,
label: 'Employee Information',
position: 10
},{
id: 'PersonalDetails',
type: #FIELDGROUP_REFERENCE,
targetQualifier: 'PersonalDetails',
label: 'Personal Details',
position: 10,
parentId: 'EmployeeInfo'
},{
id: 'JobDetails',
type: #FIELDGROUP_REFERENCE,
targetQualifier: 'JobDetails',
label: 'Job Details',
position: 20,
parentId: 'EmployeeInfo'
}]
@UI.lineItem: [{ position: 10, label: 'Employee ID' }]
@UI.selectionField: [{ position: 10 }]
@UI.identification: [{ position: 10 }]
@UI.fieldGroup: [{ qualifier: 'PersonalDetails', position: 10 }]
key EmployeeId,
@UI.lineItem: [{ position: 20, label: 'First Name' }]
@UI.selectionField: [{ position: 20 }]
@UI.fieldGroup: [{ qualifier: 'PersonalDetails', position: 20 }]
FirstName,
@UI.lineItem: [{ position: 30, label: 'Last Name' }]
@UI.fieldGroup: [{ qualifier: 'PersonalDetails', position: 30 }]
LastName,
@UI.lineItem: [{ position: 40, label: 'Email' }]
@UI.fieldGroup: [{ qualifier: 'PersonalDetails', position: 40 }]
Email,
@UI.lineItem: [{
position: 50,
label: 'Department',
criticality: 'StatusCriticality'
}]
@UI.selectionField: [{ position: 30 }]
@UI.fieldGroup: [{ qualifier: 'JobDetails', position: 10 }]
Department,
@UI.lineItem: [{ position: 60, label: 'Designation' }]
@UI.fieldGroup: [{ qualifier: 'JobDetails', position: 20 }]
Designation,
@UI.lineItem: [{ position: 70, label: 'Joining Date' }]
@UI.fieldGroup: [{ qualifier: 'JobDetails', position: 30 }]
JoiningDate,
@UI.lineItem: [{
position: 80,
label: 'Salary',
importance: #HIGH
}]
@UI.fieldGroup: [{ qualifier: 'JobDetails', position: 40 }]
Salary,
@UI.lineItem: [{
position: 90,
label: 'Status',
criticality: 'StatusCriticality'
}]
@UI.selectionField: [{ position: 40 }]
@UI.fieldGroup: [{ qualifier: 'JobDetails', position: 50 }]
Status,
/* Technical fields */
CreatedBy,
CreatedAt,
LastChangedBy,
LastChangedAt,
LocalLastChangedAt,
/* Virtual field for criticality */
case Status
when 'A' then 3
when 'I' then 1
else 2
end as StatusCriticality
}This consumption view is what Fiori Elements reads entirely. Every column in List Report, every field in Object Page sections, every filter in filter bar — all controlled from here through annotations.
Step 4 — Behavior Definition
Behavior Definition declares what business operations your app supports. This is the RAP contract.
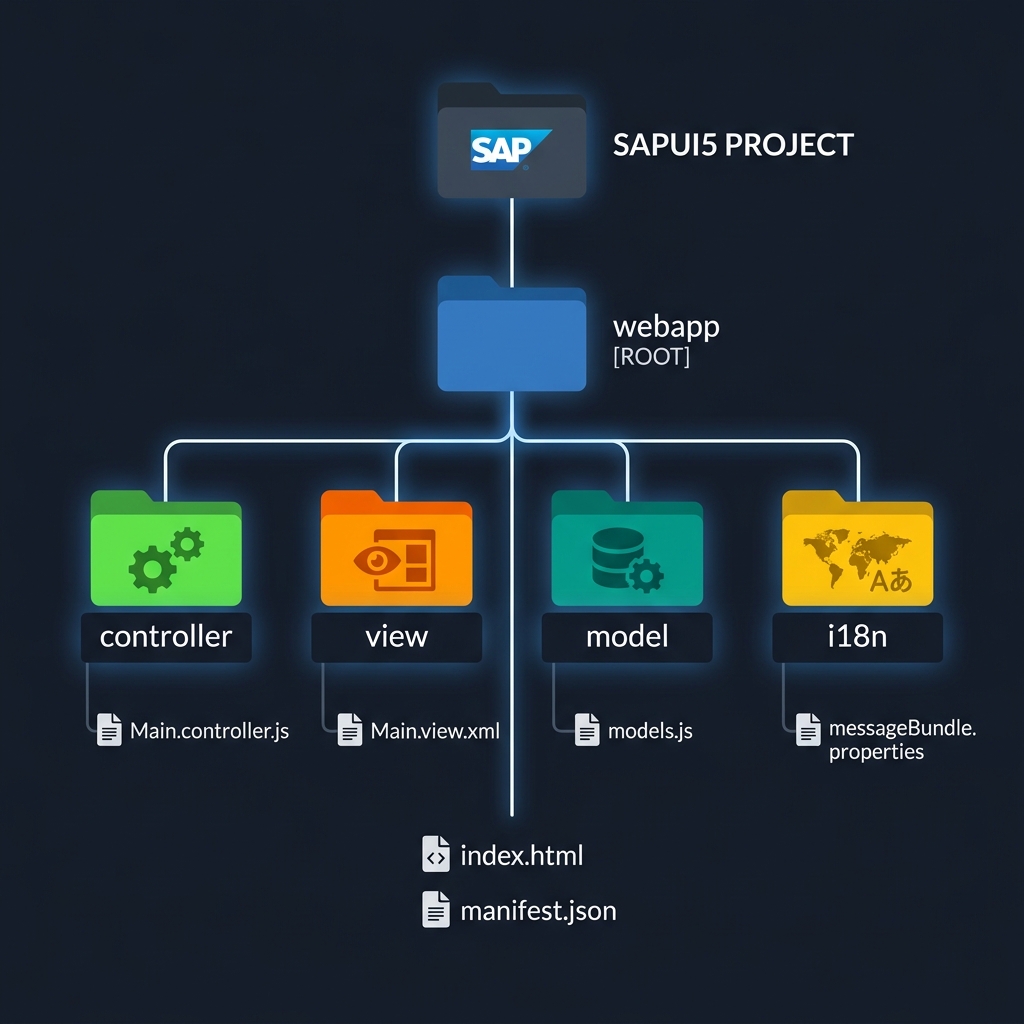 Figure 5: Specifying validation stages, draft tables, and custom triggers inside the BDEF.
managed implementation in class zbp_employee unique;
strict ( 2 );
with draft;
define behavior for ZC_Employee alias Employee
persistent table zemployee_t
draft table zemployee_d
lock master total etag LastChangedAt
authorization master ( global )
etag master LocalLastChangedAt
{
/* Standard CRUD operations */
create;
update;
delete;
/* Field controls */
field ( readonly ) EmployeeId;
field ( readonly : update ) CreatedBy, CreatedAt;
field ( mandatory ) FirstName, LastName, Email,
Department, Designation;
/* Number range for Employee ID */
determination setEmployeeId on modify { create; }
/* Validations */
validation validateEmail on save { create; update; }
validation validateSalary on save { create; update; }
/* Custom actions */
action activateEmployee result [1] $self;
action deactivateEmployee result [1] $self;
/* Draft actions - generated automatically with draft */
draft action Edit;
draft action Activate optimized;
draft action Discard;
draft action Resume;
draft determine action Prepare;
/* Mapping */
mapping for zemployee_t corresponding
{
EmployeeId = employee_id;
FirstName = first_name;
LastName = last_name;
Email = email;
Department = department;
Designation = designation;
JoiningDate = joining_date;
Salary = salary;
Status = status;
CreatedBy = created_by;
CreatedAt = created_at;
LastChangedBy = last_changed_by;
LastChangedAt = last_changed_at;
LocalLastChangedAt = local_last_changed_at;
}
}Breaking down the important parts:
- managed — tells RAP to handle standard CRUD database operations automatically. You don’t write INSERT, UPDATE, DELETE statements — RAP does it based on your behavior definition.
- with draft — enables draft functionality. Users can start creating an employee, save as draft, come back later and continue. Two tables needed — main table and draft table (
zemployee_d). - lock master total etag LastChangedAt — optimistic locking setup. If two users open same record simultaneously, second user’s save fails with conflict message — preventing data overwrites.
- determination setEmployeeId — runs automatically on create to generate employee ID from number range.
- validation validateEmail — runs before save to check email format. Returns error message if invalid.
- action activateEmployee — custom button in Fiori app that triggers specific business logic.
- mapping for zemployee_t — maps CDS view field names to database table field names. RAP needs this to know which column to update.
Step 5 — Behavior Implementation Class
This is where actual ABAP business logic lives. Create class ZBP_EMPLOYEE.
 Figure 6: Custom validations, determinations, and local execution pipelines written in Eclipse ADT.
CLASS zbp_employee DEFINITION PUBLIC ABSTRACT FINAL
FOR BEHAVIOR OF ZC_Employee.
PUBLIC SECTION.
PROTECTED SECTION.
PRIVATE SECTION.
ENDCLASS.
CLASS zbp_employee IMPLEMENTATION.
METHOD setEmployeeId.
/* Generate Employee ID from number range */
DATA: lv_number TYPE zemployee_t-employee_id.
LOOP AT entities ASSIGNING FIELD-SYMBOL(<entity>)
WHERE EmployeeId IS INITIAL.
TRY.
cl_numberrange_runtime=>number_get(
EXPORTING
nr_range_nr = '01'
object = 'ZEMP_NR'
IMPORTING
number = lv_number
).
MODIFY ENTITIES OF ZC_Employee IN LOCAL MODE
ENTITY Employee
UPDATE FIELDS ( EmployeeId )
WITH VALUE #( (
%tky = <entity>-%tky
EmployeeId = lv_number
) ).
CATCH cx_number_ranges INTO DATA(lx_error).
APPEND VALUE #(
%tky = <entity>-%tky
%msg = new_message_with_text(
severity = if_abap_behv_message=>severity-error
text = lx_error->get_text( )
)
) TO failed-employee.
ENDTRY.
ENDLOOP.
ENDMETHOD.
METHOD validateEmail.
/* Validate email format */
READ ENTITIES OF ZC_Employee IN LOCAL MODE
ENTITY Employee
FIELDS ( Email )
WITH CORRESPONDING #( keys )
RESULT DATA(lt_employees).
LOOP AT lt_employees ASSIGNING FIELD-SYMBOL(<emp>).
/* Simple email validation */
IF <emp>-Email IS INITIAL OR
NOT <emp>-Email CS '@' OR
NOT <emp>-Email CS '.'.
APPEND VALUE #(
%tky = <emp>-%tky
%state_area = 'VALIDATE_EMAIL'
) TO reported-employee.
APPEND VALUE #(
%tky = <emp>-%tky
) TO failed-employee.
APPEND VALUE #(
%tky = <emp>-%tky
%msg = new_message_with_text(
severity = if_abap_behv_message=>severity-error
text = 'Please enter a valid email address'
)
%element-Email = if_abap_behv=>mk-on
) TO reported-employee.
ENDIF.
ENDLOOP.
ENDMETHOD.
METHOD validateSalary.
/* Validate salary is positive */
READ ENTITIES OF ZC_Employee IN LOCAL MODE
ENTITY Employee
FIELDS ( Salary )
WITH CORRESPONDING #( keys )
RESULT DATA(lt_employees).
LOOP AT lt_employees ASSIGNING FIELD-SYMBOL(<emp>).
IF <emp>-Salary <= 0.
APPEND VALUE #(
%tky = <emp>-%tky
%msg = new_message_with_text(
severity = if_abap_behv_message=>severity-error
text = 'Salary must be greater than zero'
)
%element-Salary = if_abap_behv=>mk-on
) TO reported-employee.
APPEND VALUE #(
%tky = <emp>-%tky
) TO failed-employee.
ENDIF.
ENDLOOP.
ENDMETHOD.
METHOD activateEmployee.
/* Set employee status to Active */
MODIFY ENTITIES OF ZC_Employee IN LOCAL MODE
ENTITY Employee
UPDATE FIELDS ( Status )
WITH VALUE #( FOR key IN keys (
%tky = key-%tky
Status = 'A'
) ).
READ ENTITIES OF ZC_Employee IN LOCAL MODE
ENTITY Employee ALL FIELDS
WITH CORRESPONDING #( keys )
RESULT DATA(lt_result).
result = VALUE #( FOR ls_result IN lt_result (
%tky = ls_result-%tky
%param = ls_result
) ).
ENDMETHOD.
METHOD deactivateEmployee.
/* Set employee status to Inactive */
MODIFY ENTITIES OF ZC_Employee IN LOCAL MODE
ENTITY Employee
UPDATE FIELDS ( Status )
WITH VALUE #( FOR key IN keys (
%tky = key-%tky
Status = 'I'
) ).
READ ENTITIES OF ZC_Employee IN LOCAL MODE
ENTITY Employee ALL FIELDS
WITH CORRESPONDING #( keys )
RESULT DATA(lt_result).
result = VALUE #( FOR ls_result IN lt_result (
%tky = ls_result-%tky
%param = ls_result
) ).
ENDMETHOD.
ENDCLASS.What each method does in plain words:
- setEmployeeId — runs automatically when new employee is created. Calls SAP number range object to get next available employee ID. If number range fails, returns proper error message to user.
- validateEmail — runs before every save. Checks email field has
@symbol and dot. If invalid — marks the Email field in red on Fiori screen and shows error message. User cannot save until fixed. - validateSalary — runs before save. Checks salary is positive number. Marks Salary field in red if zero or negative.
- activateEmployee — custom action triggered by Activate button in Fiori app. Updates Status field to ‘A’. Returns updated record so Fiori app refreshes display.
- deactivateEmployee — same pattern, sets Status to ‘I’.
Notice IN LOCAL MODE in all MODIFY and READ statements inside behavior implementation. This bypasses authorization checks during internal processing — important for determinations and validations that run in system context.
Step 6 — Service Definition and Binding
Two final ABAP objects needed to expose your RAP business object as OData service.
Service Definition — declares which CDS entities to expose:
@EndUserText.label: 'Employee Service Definition'
define service ZSD_Employee {
  expose ZC_Employee as Employee;
}Simple. Just declares what to expose and under what name.
Service Binding — creates actual OData endpoint:
Create Service Binding ZSB_EMPLOYEE_O4 with binding type OData V4 - UI. Link it to service definition ZSD_Employee. Publish it.
After publishing — SAP generates the OData V4 service URL automatically. You can preview it directly from the Service Binding in ADT — click Preview button and a Fiori Elements List Report app opens in browser showing your employee data.
That preview is your RAP service working end to end — without writing a single line of frontend SAPUI5 code.
Step 7 — Connecting RAP to Fiori Elements App
With RAP service published — connecting to Fiori Elements app takes minutes using Fiori Tools in Business Application Studio.
In BAS:
- Open Application Generator.
- Select List Report + Object Page floorplan.
- Select OData V4 as service type.
- Connect to your S/4HANA system via destination.
- Select
ZSB_EMPLOYEE_O4service. - Select Employee entity set.
- Generate — complete app scaffold created instantly.
Generated app reads all annotations from your consumption CDS view automatically. List Report shows columns from @UI.lineItem. Filter bar shows fields from @UI.selectionField. Object Page sections from @UI.facet. Activate and Deactivate buttons from action annotations. Edit mode with draft support because of with draft in behavior definition.
Complete production-quality Fiori Elements app — backend fully handled by RAP, frontend fully generated by Fiori Elements.
RAP Managed vs Unmanaged — When to Use Which
One important decision point in RAP that beginners often miss.
 Figure 7: Decision roadmap: choosing managed RAP database handlers versus custom unmanaged ABAP controllers.
Managed RAP
RAP framework handles all database operations — INSERT, UPDATE, DELETE — automatically based on your behavior definition and mapping.
- Use when: standard CRUD on a single database table or simple table hierarchy. Most new development scenarios.
Unmanaged RAP
You write all database operations yourself in ABAP code. Framework provides the structure but you control every database interaction.
unmanaged implementation in class zbp_employee_unmanaged unique;- Use when: complex legacy table structures, multiple tables involved in one operation, migration from existing Gateway services where business logic is already written, scenarios where RAP managed framework doesn’t handle your data model correctly.
Most new Fiori development uses managed RAP. Unmanaged is for complex legacy scenarios where you need full control.
Draft Handling in RAP — Why It Matters for Real Apps
Draft is one of RAP’s most powerful features and one that Gateway made extremely painful.
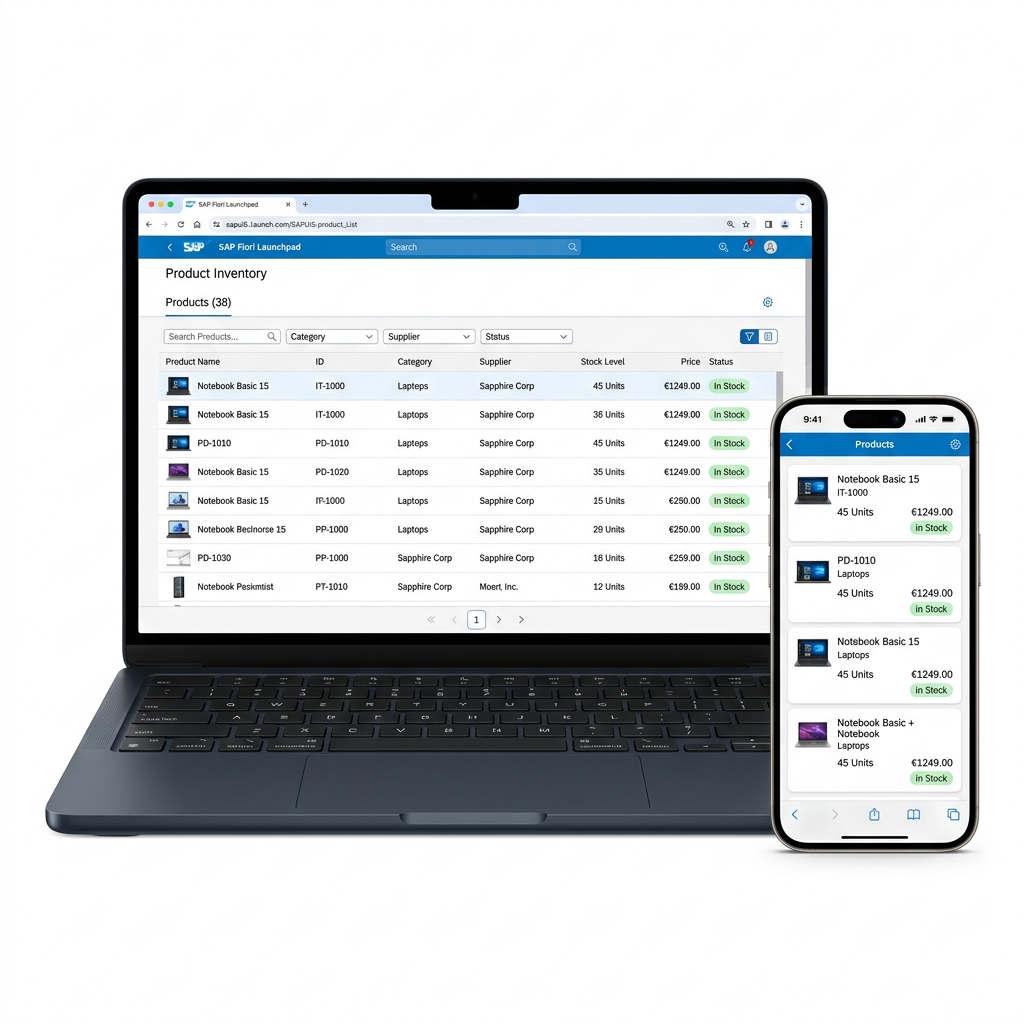 Figure 8: Draft handling pipeline syncing temporary states to database segments automatically.
With with draft in behavior definition and a draft table in your database — your Fiori app automatically supports:
- Auto-save while editing — user starts editing an employee record. Every 30 seconds Fiori automatically saves current state as draft. Browser crashes — user reopens app, sees “You have unsaved changes” message, continues exactly where they left off.
- Multi-device editing — user starts editing on laptop, receives a phone call, picks up phone and continues editing on mobile. Draft syncs across devices because it’s stored in SAP database, not browser.
- Conflict detection — if another user already has the record locked for editing, current user sees a clear message instead of silently overwriting changes.
- Locking — while one user has a draft open, record is locked. Other users can view but not edit. Lock releases when user activates or discards draft.
All of this comes automatically from those few lines in behavior definition. This is why with draft appears in nearly every production RAP app — users expect these behaviors from modern enterprise applications.
Common RAP Mistakes Beginners Make
- Mistake 1: Forgetting administrative fields in database table. Without
created_at,last_changed_at,local_last_changed_at— optimistic locking and draft don’t work. Always include them. - Mistake 2: Putting UI annotations on Interface View. Interface view should stay clean — no UI annotations. Consumption view carries all UI annotations. Mixing them breaks reusability.
- Mistake 3: Not using IN LOCAL MODE inside behavior implementation. Without
IN LOCAL MODE—READandMODIFYinside determinations and validations trigger authorization checks and locks unnecessarily, causing performance issues and unexpected failures. - Mistake 4: Skipping mapping section in behavior definition. If CDS view field names differ from database table column names — mapping is mandatory. Forgetting it causes RAP to fail silently on create and update operations.
- Mistake 5: Activating service binding before publishing. Service Binding needs to be explicitly published after creation. Many beginners activate it but don’t publish — service URL doesn’t appear and preview doesn’t work.
- Mistake 6: Draft table not created before activating behavior definition. If
with draftis in behavior definition but draft table doesn’t exist — activation fails. Create draft table first with same structure as main table plus RAP draft-specific fields.
RAP Career Value in 2026 — Why This Skill Pays
Here is the honest market picture.
RAP is SAP’s strategic direction for all new ABAP development. S/4HANA Cloud only supports RAP-based services — no Gateway. On-premise S/4HANA strongly recommends RAP for new development. Every new standard SAP Fiori app is built on RAP.
This means every S/4HANA implementation project needs RAP developers. Every migration from ECC to S/4HANA needs someone who can assess existing Gateway services and rewrite them in RAP. Every Fiori Elements app needs a proper RAP backend.
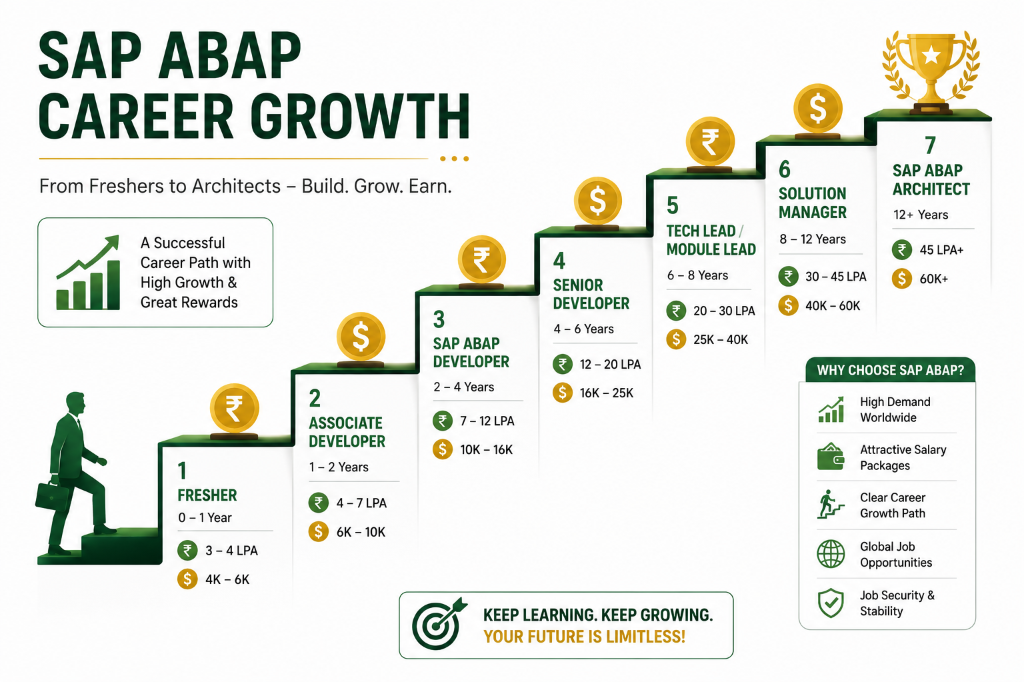 Figure 9: Typical compensation ranges and growth trajectories for ABAP RAP backend developers in 2026.
Salary ranges (India, 2026 approximate):
| Experience | Role | CTC Range |
|---|---|---|
| 0 – 1 year | Junior RAP Developer | ₹5 LPA – ₹9 LPA |
| 1 – 3 years | RAP / Fiori Developer | ₹9 LPA – ₹18 LPA |
| 3 – 6 years | Senior RAP Consultant | ₹18 LPA – ₹35 LPA |
| 6+ years | RAP Architect | ₹35 LPA – ₹65+ LPA |
Developers who combine RAP backend with Fiori Elements frontend — full stack Fiori developers — are among the most sought profiles on S/4HANA projects globally.
Free Resources to Learn RAP Right Now
- SAP Learning Site — learning.sap.com → search “RAP” → free learning journey covering RAP fundamentals through advanced topics.
- SAP BTP ABAP Environment Free Tier — practice RAP without on-premise system. Create free BTP trial at account.hanatrial.ondemand.com → activate ABAP environment → build RAP services in browser using Eclipse ADT connected to cloud ABAP.
- SAP Developers YouTube — search “RAP tutorial ABAP” — official SAP videos walking through complete RAP apps step by step.
- SAP Community RAP Tag — community.sap.com → search RAP → hundreds of detailed blog posts from experienced developers covering every RAP scenario.
- ABAP RESTful Application Programming Model Documentation — help.sap.com → SAP S/4HANA → ABAP Development → RAP — official documentation is genuinely well written for this framework.
Looking Ahead
RAP changes how ABAP developers think about building services. The shift from Gateway’s procedural, manually-wired approach to RAP’s declarative, framework-managed approach is significant — and it takes genuine practice to internalize.
But once it clicks — once you feel how quickly a complete transactional Fiori app comes together with managed RAP, proper CDS annotations, and Fiori Elements — you won’t want to go back.
Build the employee app from this post in your BTP ABAP environment. Every step is here. Follow it exactly, understand what each piece does, then modify it — add a new field, add a new validation, add a new custom action. That iteration process builds RAP intuition faster than anything else.
The stack is clear. Table → Interface CDS → Consumption CDS with annotations → Behavior Definition → Behavior Implementation → Service Definition → Service Binding.
Seven steps. One coherent system. Production-quality Fiori app.
Keep building. Keep learning.
 Figure 10: Complete ABAP RAP service and generated Fiori Elements client rendering live dashboard transactions.
— Daksh
Self-Assessment Checkpoint
💡 **What is the difference between Managed and Unmanaged RAP?**
In Managed RAP, the framework manages all database CRUD operations (Insert, Update, Delete) automatically based on behavior mappings. In Unmanaged RAP, the developer is responsible for manually writing all database operations inside the behavior implementation ABAP class methods.
💡 **Why are created_at and last_changed_at timestamps critical in managed tables?**
These timestamp fields are used by the RAP framework to perform concurrency validations (optimistic locking checks) and to coordinate state management for draft records (draft handling).
💡 **What does 'IN LOCAL MODE' do in behavior implementation methods?**
Using IN LOCAL MODE in entity statements tells the engine to run read and update operations in the system context, thereby bypassing standard security authorization checks and locks.

Written by Daksh Dedha
SAP Technical ConsultantDaksh is an SAP Technical Consultant specializing in ABAP programming, SAP S/4HANA migrations, Fiori development, and BTP cloud architecture. He authors free, hands-on tutorials to make enterprise SAP education accessible to all developers.
Test Your Knowledge
Loading question...
Quiz Completed
Related Tutorials
SAP Fiori End to End Implementation — From Backend to Launchpad in Plain Steps
Complete SAP Fiori end to end implementation guide. Covers backend activation, OData service setup, Fiori Launchpad configuration, role assignment, and testing.
SAP FioriSAP Fiori Launchpad Configuration — Complete Setup and Customization Guide
Step by step guide to SAP Fiori Launchpad configuration. Learn how to set up catalogs, groups, spaces, pages, custom tiles, and role-based access in FLP.
SAP FioriTop 30 SAP SD Interview Questions & Answers – Complete Guide
Master your next SAP Sales and Distribution (SD) functional interview. Study core concepts, the OTC cycle, Pricing Procedures, and logistics configuration.
Found this tutorial useful? Share it with your SAP development team.