
SAP Fiori End to End Implementation — From Backend to Launchpad in Plain Steps
Table of Contents
- • Before we start — understand the architecture
- • Step 1: Find your app in the Fiori Apps Library
- • Step 2: Activate the OData service on the backend
- ↳ 2A: Check SAP Gateway registration
- ↳ 2B: Activate the OData service
- ↳ 2C: Test the OData service
- • Step 3: Activate ICF nodes
- • Step 4: Assign the business catalog and group
- ↳ 4A: Understand catalogs and groups
- ↳ 4B: Create a Launchpad role with the catalog
- ↳ 4C: Verify catalog content
- • Step 5: Deploy the SAPUI5 application (separate Gateway only)
- ↳ 5A: Download from SAP Software Center
- ↳ 5B: Deploy via transaction /UI5/THEME_TOOL or ABAP Repository Upload
- ↳ 5C: Register the app
- • Step 6: Test the complete flow
- ↳ 6A: Open the Fiori Launchpad
- ↳ 6B: Check the tile
- ↳ 6C: Click the tile and test
- • The authorizations you’ll probably forget
- • Step 7: Transport to production
- • Quick checkpoint
- • Common mistakes
- • Putting it all together
Let me tell you about the first time I tried to activate a Fiori app.
I found the app in the Fiori Apps Library. I activated the OData service. I assigned the catalog to my user. I opened the Launchpad. And nothing. Blank page. No tile. No error message. Just… nothing.
I spent 4 hours troubleshooting. The problem? I’d activated the OData service in the wrong system. The backend was EHP8, the frontend server was on a separate box, and I didn’t realize the ICF node needed activation on BOTH systems. Nobody told me that. Every tutorial I found online either covered the backend OR the frontend, never the full picture.
So this post covers the complete flow. Every single step from “I found a Fiori app I want” to “it’s working in the Launchpad and users can access it.” No skipping. No assumptions.
I’m using the standard Fiori app “Manage Purchase Orders” (F0842) as the running example throughout. Everything I describe here applies to any standard Fiori app — the steps are the same, just the service names and catalog IDs change.
Before we start — understand the architecture
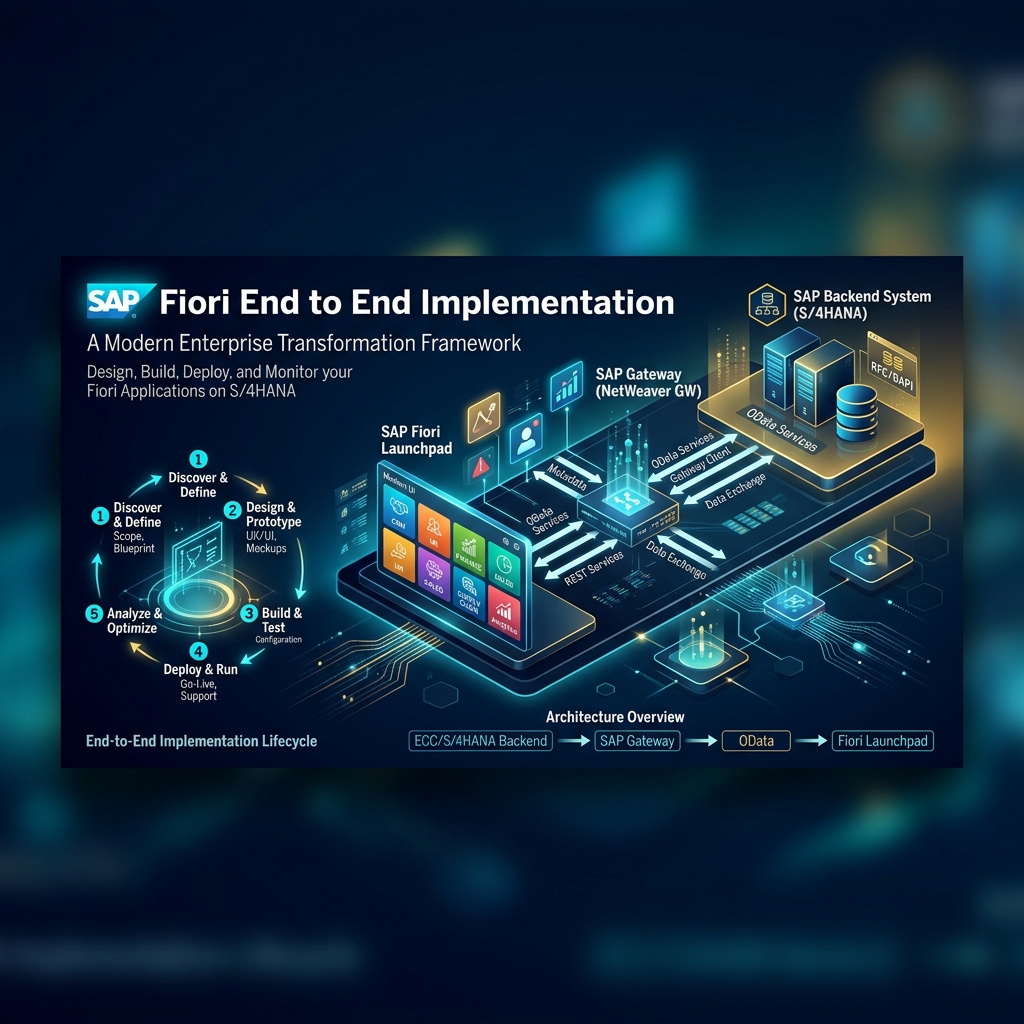
You need to understand one thing clearly before touching any configuration. SAP Fiori runs on a two-system architecture (in most real-world setups):
Backend system: Your S/4HANA or ECC system where the actual business data lives. Purchase orders, financial documents, material masters — all here.
Frontend server (SAP Gateway / FES): A separate ABAP system that hosts the Fiori UI5 applications, serves the Launchpad, and routes OData requests to the backend. In S/4HANA embedded deployments, the frontend and backend are the same system (called “embedded Gateway”). In ECC setups, they’re usually separate.
Every standard Fiori app has two components:
- Backend component: OData service (the data pipe) + business logic (BAPI/BOPF/CDS views)
- Frontend component: SAPUI5 application (the actual screen the user sees in their browser)
Both components need to be activated and connected. That’s where most people get lost.
I’ll cover both the separate Gateway scenario and the embedded Gateway scenario. If you’re on S/4HANA 2020 or later, you’re probably embedded. If you’re on ECC with a separate SAP Gateway server, that’s the separate scenario.
Step 1: Find your app in the Fiori Apps Library
Go to fioriappslibrary.hana.ondemand.com.
Search for “Manage Purchase Orders” (or whatever app you need).
Click on the app. You’ll see a details page with critical information:
| Field | What to note |
|---|---|
| App ID | F0842 (you’ll need this) |
| Application Type | Transactional (could also be Analytical, Fact Sheet, etc.) |
| OData Service(s) | The technical service name(s) to activate on the backend |
| SAP Fiori Frontend Server Component | The SAPUI5 component to activate on the frontend |
| Required Backend Product | S/4HANA version / ECC EHP level needed |
| ICF Services | ICF nodes that need to be active |
| Business Catalog | The Fiori catalog containing this app’s tile |
| Business Role | The SAP-delivered role template |
Write all of this down. Seriously. Open a notepad and copy these values. You will need every single one of them across the next 6 steps.
Step 2: Activate the OData service on the backend
Log into your backend system (your S/4HANA or ECC system).
2A: Check SAP Gateway registration
Go to transaction SPRO → SAP Reference IMG → SAP NetWeaver → Gateway → OData Channel → Configuration → Connection Settings → SAP Gateway to SAP Server → Manage SAP System Aliases.
Verify that a system alias exists pointing the Gateway to itself (for embedded) or to your backend system (for separate Gateway). The alias name is usually something like LOCAL or your SID.
If there’s no alias, create one. Without this, OData requests have nowhere to route.
2B: Activate the OData service
Transaction: /n/IWFND/MAINT_SERVICE
This is the service maintenance transaction. Here’s what to do:
- Click Add Service.
- In the popup, enter the System Alias (usually
LOCALfor embedded scenarios). - Click Get Services. This loads all available but not-yet-activated services.
- Find your service. For “Manage Purchase Orders,” search for
MM_PUR_PO_MAINT(the service name from the Fiori Apps Library). - Select it and click Add Selected Services.
- Confirm the package assignment (use
$TMPfor testing, a proper transport for production).
The service should now appear in the main list with a green status.
2C: Test the OData service
Stay in /IWFND/MAINT_SERVICE. Select your service and click Call Browser (or click the service row and press SAP Gateway Client).
You should see an XML or JSON response with metadata. If you get an HTTP 200 and see XML, the service is alive. If you get a 404 or 500 error, something’s wrong — check the ICF node activation (next step).
Step 3: Activate ICF nodes
Transaction: SICF
ICF (Internet Communication Framework) nodes are the HTTP endpoints that make OData services reachable over the network. If the ICF node is inactive, the service exists but nobody can call it.
Navigate to: default_host/sap/opu/odata/sap/
Find your service node (e.g., MM_PUR_PO_MAINT_SRV). Right-click → Activate Service.
Also make sure these general Fiori ICF nodes are active:
| ICF Path | Purpose |
|---|---|
/sap/opu/odata/ | OData service root |
/sap/bc/ui5_ui5/ | SAPUI5 application hosting |
/sap/bc/ui2/flp | Fiori Launchpad |
/sap/bc/ui2/start_up | Launchpad startup services |
/sap/bc/ui2/cdm3 | Content delivery |
/sap/public/bc/ui5_ui5/ | Public UI5 resources |
If any of these are inactive, the Launchpad won’t load or apps won’t render. Activate them all.
Step 4: Assign the business catalog and group
This is where the Fiori tile actually appears in the Launchpad.
4A: Understand catalogs and groups
- Business Catalog: A collection of tiles/apps grouped by function. SAP delivers standard catalogs (e.g.,
SAP_MM_BC_PO_MANAGE_PCfor Purchase Order management apps). Catalogs define WHAT apps are available. - Business Group: Organizes tiles on the Launchpad home page. Groups define WHERE apps appear on screen.
4B: Create a Launchpad role with the catalog
Transaction: PFCG
- Create a new role (e.g.,
Z_FIORI_MM_PO_MANAGE). - Go to the Menu tab.
- Click Transaction → SAP Fiori Launchpad → Catalogs and Groups → Catalog.
- Enter the catalog ID from the Fiori Apps Library:
SAP_MM_BC_PO_MANAGE_PC. - Also add a Group. You can use SAP’s standard group or create a custom one (e.g.,
Z_MM_PO_GROUP). - Go to the Authorizations tab → click Generate Profile. This generates the authorization profile with all the auth objects the app needs.
- Go to the User tab → add your test user.
4C: Verify catalog content
Transaction: /UI2/FLPCM_CUST (Fiori Launchpad Content Manager)
Open the catalog SAP_MM_BC_PO_MANAGE_PC. You should see the “Manage Purchase Orders” tile listed inside. If the catalog is empty, the SAPUI5 frontend component hasn’t been deployed to the system yet. Check Step 5.
Step 5: Deploy the SAPUI5 application (separate Gateway only)
If you’re on embedded S/4HANA: Skip this step. The UI5 apps are already deployed as part of the S/4HANA installation.
If you’re on a separate Frontend Server (Gateway): You need to deploy the SAPUI5 component from SAP’s software repository.
5A: Download from SAP Software Center
Go to support.sap.com → Software Downloads. Search for the SAPUI5 component name from the Fiori Apps Library. Download the ZIP file.
5B: Deploy via transaction /UI5/THEME_TOOL or ABAP Repository Upload
Use transaction /UI5/THEME_TOOL or the BSP repository upload (transaction SE80 → BSP Application → Upload) to deploy the downloaded UI5 app to the frontend server.
After deployment, the BSP application should be visible in SE80 under /UI5/ repository.
5C: Register the app
If the app needs registration on the Gateway, go back to /IWFND/MAINT_SERVICE on the frontend server and verify the service routing. The frontend server needs to know which backend system to route OData requests to.
Step 6: Test the complete flow
Now comes the moment of truth.
6A: Open the Fiori Launchpad
In your browser, navigate to:
https://<your-server>:<port>/sap/bc/ui2/flpLog in with the test user who has the PFCG role from Step 4.
6B: Check the tile
You should see the “Manage Purchase Orders” tile on the Launchpad home page. If you don’t:
Troubleshooting checklist:
| Symptom | Likely cause |
|---|---|
| Launchpad loads but no tiles | Catalog/Group not assigned in PFCG role, or role not assigned to user |
| Launchpad doesn’t load at all | ICF nodes inactive (check /sap/bc/ui2/flp in SICF) |
| Tile visible but shows error on click | OData service not activated, or authorization missing |
| ”Service unavailable” error | System alias misconfigured in SPRO |
| Tile loads but no data | Backend authorizations missing (check SU53 for auth failures) |
6C: Click the tile and test
Click the tile. The app should open. You should see purchase order data from your backend system. Try creating a PO, editing one, filtering the list.
If the app works with real data, congratulations. You’ve completed a full end-to-end Fiori implementation.
The authorizations you’ll probably forget
This section exists because authorizations trip up 80% of first-time Fiori implementations.
When a user clicks a Fiori tile, several authorization checks happen:
- Launchpad authorization: Does the user have access to the Fiori Launchpad? (Object:
S_SERVICE, with the FLP service) - Catalog authorization: Does the user have the business catalog assigned? (Managed by the PFCG role)
- OData service authorization: Can the user call the OData service? (Object:
S_SERVICE, with the OData service name) - Backend business authorization: Can the user perform the actual business action? For “Manage Purchase Orders,” this includes
M_BEST_EKO(purchasing org),M_BEST_EKG(purchasing group),M_BEST_WRK(plant), and others.
If any of these checks fail, the user sees an error. Use transaction SU53 immediately after the error to see which authorization object was checked and failed. That tells you exactly what’s missing.
Pro tip: after adding the missing auth object to the role, regenerate the authorization profile in PFCG and do a user comparison. Forgetting the user comparison is probably the most common Fiori admin mistake I see.
Step 7: Transport to production
Everything you did above was (hopefully) in a development or sandbox system. For production:
- OData service activation: Record the activation in a transport request when you do it in /IWFND/MAINT_SERVICE. Transport it through your landscape (DEV → QAS → PRD).
- ICF nodes: Activate them in each system manually. ICF activations aren’t transportable.
- PFCG roles: Transport the role and its authorization profile.
- System aliases: Configure in each system via SPRO. Not transportable.
- SAPUI5 apps (if separate Gateway): Deploy to each frontend server.
The general rule: anything in a transport goes through your landscape. Anything that’s system-specific configuration (ICF nodes, system aliases) needs manual setup in each system.
Quick checkpoint
Question 1: You activated an OData service in /IWFND/MAINT_SERVICE but get a 404 error when testing. What’s the most likely cause?
Answer: The ICF node for the service is inactive in SICF. Activate it.
Question 2: A user can see the Fiori Launchpad but no tiles appear. The PFCG role has the business catalog assigned. What should you check?
Answer: Check if the role is actually assigned to the user (PFCG → User tab), and check if the authorization profile was generated and a user comparison was done.
Question 3: A user clicks the “Manage Purchase Orders” tile and sees data, but gets an error when trying to create a new PO. Where do you look?
Answer: Run SU53 on the user’s session. The error is likely a missing backend authorization object (M_BEST_EKO, M_BEST_EKG, etc.). The Fiori app loads fine because OData read works, but the create operation needs additional auth objects.
Common mistakes
Mistake 1: Activating services on the wrong system. In a separate Gateway setup, you activate the OData service on BOTH the backend (as a provider) and the frontend server (as a consumer). Miss either one and it doesn’t work. This was my exact mistake the first time, mentioned at the beginning of this post.
Mistake 2: Forgetting to clear the Fiori cache. After making changes to catalogs or groups, the browser and server-side caches can serve stale content. Clear your browser cache, and on the server side, run /UI2/CACHE_DEL to invalidate the Launchpad cache.
Mistake 3: Not checking the Fiori Apps Library thoroughly. Some Fiori apps have prerequisites — specific SAP Notes, specific S/4HANA feature pack levels, specific business function activations (transaction SFW5). The Fiori Apps Library lists all of these. Read the entire page before starting.
Mistake 4: Testing with SAP_ALL. If you test with a user who has SAP_ALL, everything works. Then you give the app to a real business user with limited authorizations, and nothing works. Always test with a user who has only the PFCG role you created. That’s the only way to validate your authorization setup.
Mistake 5: Skipping the system alias configuration. I’ve seen people activate the OData service, activate the ICF node, set up the role, and then wonder why clicking the tile gives “Service unavailable.” The system alias in SPRO is easy to forget because it’s a one-time setup, but without it, the Gateway doesn’t know where to send OData requests.
Putting it all together
Here’s the complete checklist in order:
- ☐ Find app in Fiori Apps Library. Note all technical details.
- ☐ Activate OData service in /IWFND/MAINT_SERVICE on backend.
- ☐ Verify system alias exists in SPRO.
- ☐ Activate ICF nodes in SICF (service-specific + general Fiori nodes).
- ☐ Test OData service via SAP Gateway Client (HTTP 200 = good).
- ☐ Deploy SAPUI5 app to frontend server (skip if embedded S/4HANA).
- ☐ Create PFCG role with business catalog + group.
- ☐ Generate authorization profile in PFCG.
- ☐ Assign role to test user. Do user comparison.
- ☐ Open Fiori Launchpad in browser. Verify tile appears.
- ☐ Click tile. Test with real data. Check all CRUD operations.
- ☐ Check SU53 for any authorization failures.
- ☐ Transport everything to QAS/PRD.
Follow this checklist for every new Fiori app you activate. The steps are identical every time. After your third app, you’ll do it from muscle memory.
Related reads on this site:
- SAP Fiori Development Complete Guide — building custom Fiori apps
- SAP Fiori Elements Tutorial — code-free Fiori app generation
- SAP Fiori RAP Backend Development — building OData services with RAP

Written by Daksh Dedha
SAP Technical ConsultantDaksh is an SAP Technical Consultant specializing in ABAP programming, SAP S/4HANA migrations, Fiori development, and BTP cloud architecture. He authors free, hands-on tutorials to make enterprise SAP education accessible to all developers.
Test Your Knowledge
Loading question...
Quiz Completed
Related Tutorials
SAP Fiori Launchpad Configuration — Complete Setup and Customization Guide
Step by step guide to SAP Fiori Launchpad configuration. Learn how to set up catalogs, groups, spaces, pages, custom tiles, and role-based access in FLP.
SAP FioriTop 30 SAP SD Interview Questions & Answers – Complete Guide
Master your next SAP Sales and Distribution (SD) functional interview. Study core concepts, the OTC cycle, Pricing Procedures, and logistics configuration.
SAP FioriTop 50 SAP Fiori Interview Questions (With Answers) – Complete Guide
Master your next SAP Fiori job interview with this complete guide of 50 questions covering basic principles, architecture, Fiori Elements, OData, and
Found this tutorial useful? Share it with your SAP development team.